Saturday 23 August 2014

Easy Peasy Pavlova Bites

If you're looking for something easy to whip up for dessert this Summer, you should definitely try these easy peasy pavlova bites. You can make the base up to a week and a half before the day you plan to serve them which leaves only the assembling for the busy day - super! 


Ingredients 
3 egg whites 
100g caster sugar 
50g icing sugar

For Decoration
250ml fresh whipping cream 
Fresh berries of your choice 
Grated or melted chocolate 

----------------------------------

Method

1) Preheat your oven to 110C / 230F / Gas Mark 1/2, and line a flat baking tray with greaseproof paper.
2) Whisk your egg whites using an electric mixer until the mixture forms a peak when the beater is lifted. 
3) Add half the caster sugar to the mixing bowl and mix again until the mixture forms a peak again when the beater is lifted. 
4) Add the remaining caster sugar to the bowl and once again beat for aprox 5 minutes until the mixture forms a peak again once the beater is lifted. 
5) Fold the icing sugar into the mix using a metal spoon, then fill you piping bag fitted with a large star nozzle with the mix and pipe small amounts of the mix onto your baking tray. 
6) Bake the mini pavlovas for 1.75 hours, then leave to cool before storing in an airtight container. 

----------------------------------------------------------------------------------

When Decorating...

Whip the fresh cream with a small drop of vanilla extract and again fill your piping bag fitted with the star shaped nozzle with the mix. Pipe the cream onto each of the mini pavlovas and top with berries of your choice. Sprinkle with grated chocolate or drizzle melted chocolate over the pavlovas and dust with icing sugar. 


You can easily use any left over meringues to top a chocolate and fresh cream cake or any cake for that matter! 

Saturday 16 August 2014

Red Velvet Cake with Cream Cheese Frosting

I recently attempted my first ever red velvet cake that was, much to my concern, for an order!  I decided to try a few recipes to figure out the best. They were up to their ears in red velvet and cream cheese frosting at home - I doubt they ever want me to bake another again! I used a brilliant recipe which I found in a gorgeous cookbook given to me by my mam at Christmas time. It was extremely easy to follow and the results were perfect. 


Red velvet is an interesting cake to bake. The deep reddish brown colour is a result of a chemical reaction between baking soda, buttermilk and cocoa powder. Many add more red food colouring for a much brighter shade of red that serves as a brilliant contrast colour to the white cream cheese frosting. 


Ingredients 

FOR THE RED VELVET SPONGE

280g Plain Flour (sieved)
55g Cornflour
1.5 tsp Baking Powder (sieved) 
280g Caster Sugar 
225g Butter (softened)
4 tbsp water
55g Cocoa Powder 
3 Eggs (lightly beaten) 
250ml Buttermilk
2 tsp Vanilla Extract 
3-4 tbsp Red Food Colouring 


FOR THE CREAM CHEESE FROSTING 

50g Cream Chesse 
50g Butter (softened)
200g Icing Sugar 
1tsp Vanilla Extract 
1-2 tbsp Boiling Water 

-------------------------------------

Method

FOR THE RED VELVET SPONGE 

1) Preheat the oven to 190C / 400F / Gas Mark 5, grease 2x 6 inch round cake tins with melted butter and line with grease proof paper. 

2) In a small pot, melt the butter and cocoa powder. When combined, take off the heat and leave to sit and cool slightly. 

3) In a separate bowl, whisk the eggs, vanilla extract, buttermilk and red food colouring until the mixture forms bubble or a froth. 


4) In another separate bowl, add the sieved flour and baking powder followed by the sugar. Mix and leave to one side. 

5) Add the butter mixture to the whisked mixture and stir. Once combined, fold in the dry ingredients using a metal spoon. Only add 3-4 spoonfuls at a time.


6) Once combined, divide the mix between the two tins and bake for approx. 35 minutes. The cakes should e firm to touch. Once baked, leave the cakes to cool in their tins for 3-4 minutes. Then remove them from the tins and leave to cool fully on a wire wrack. 

----------------------------------

FOR THE CREAM CHEESE FROSTING 

1) Using your electric mixer, combine the cream cheese and the softened butter. Once combined, add the icing sugar and beat. 

2) When the mixture has reached a paste like consistency, add the vanilla extract followed by the boiling water and beat continuously for 5-6 minutes. If the frosting is still quite heavy and thick add another  tsp of boiling water. 

---------------------------------

For a sandwich style red velvet cake, simply place one cool sponge on your plate or cake board, spread a layer of your cream cheese frosting, place the other sponge on top and completely cover the cake in the remaining frosting using your pallet knife, I piped the icing for effect but either will work well. I also used a red velvet ribbon to decorate. 


If you'd rather make red velvet cupcakes simply follow the same recipe but, instead of using the two cake tins, use a muffin tray lined with bun cases. Bake the cupcakes for 15- 20 minutes until firm to touch and leave to cool on a wore wrack before icing. For something a little different, I say one bun on top of the other to form a sandwich. 


Thursday 14 August 2014

Sesame Brown Soda Loaf

Bread is one of my favourite things to bake. I used to shy away from it as I thought working with yeast and kneading dough would be too tough for an amateur, but, with this simple soda bread recipe my mind changed completely. Bread doesn't need to be complicated in the slightest.


 Ingredients 

225g Brown Flour
225g Plain Flour 
1 handful porridge oats 
4 tbsp Bran 
6 tbsp sesame seeds 
2 tbsp brown sugar 
1 pinch of salt 
1 tbsp Bread Soda
500ml Buttermilk 


Method

1) Preheat your oven to 180C/ 350f/ Gas Mark 4, grease a loaf tin with oil and line the bottom with grease proof paper 
2) Sift the flour and bread soda into your bowl, then add the remaining dry ingredients and mix with wooden spoon 
3) Make a hole in the centre of the bowl and pour in roughly half the buttermilk and mix
4) Add the remaining buttermilk and stir (be careful that the mixture is not too wet- it should be firm but still 'plop' off the spoon - if it's too wet simply add a little more flour) 
5) Empty the mixture into your tin, sprinkle some seeds on top and bake for 35-40 minutes until firm to touch
6) Leave to cool on a wire wrack, slice and enjoy - I love to eat it with thick slices of vintage cheddar or real butter and raspberry jam.

Wednesday 13 August 2014

Summer Strawberry and Orange Smoothie

Why not start your day with a vitamin packed summer smoothie? 
Smoothies are extremely easy to make and are also a great way to use up fruit that's starting to go that little bit too ripe. I always use a banana, natural yogurt and orange juice base for any smoothie that I make and pretty much add whatever fruit I can get my hands on.

This Strawberry Kiss Summer Smoothie is made up of strawberries, passion fruit, apple, orange juice, banana and natural yogurt.


MAKES 2 LARGE GLASSES

1.5 cups Orange Juice
Half cup of Natural Yogurt
2-3 cups Strawberries (either frozen or fresh)
2 Bananas
3 Apples (peeled and cored)
2 Passion fruit
1 cup of Ice

Simply blend all fruit with the juice and yogurt followed by the ice and enjoy !

Monday 11 August 2014

Coffee Lover's Dream Cake

So last weekend I baked something a little over the top for mam's birthday. After being away for the past month what could you expect?! I was raring to get back into my apron and whip up a storm. I baked a two tier coffee lovers dream cake. The bottom tier was made up of a rich mocha sponge with a chocolate and coffee ganache filling and mocha butter cream. The top was more of a traditional coffee cake made up of a light coffee and walnut sponge, a chocolate walnut ganache filling and a smooth coffee butter cream. Coffee is one of mam's all time favourites so I had to go all out for the occasion. 


THE MOCHA BOTTOM TIER

Ingredients


FOR THE MOCHA SPONGE

400g Butter (softened)
200g Caster Sugar
200g Brown Sugar
400g Self Raising flour (sieved) 
7 Eggs 
4 tbsp Cocoa Powder 
50g Dark chocolate (grated) 
4-5 tbsp Irel Coffee Essense 


FOR THE MOCHA GANACHE FILLING

280ml Double cream
200g Dark Chocolate 
2 tsp Instant Coffee Granules 
2 tbsp Golden Caster Sugar


FOR THE MOCHA BUTTERCREAM

160g Butter (softened)
300g Icing Sugar 
50g Plain chocolate 
4 tbsp Irel coffee essence 
1-2 tbsp of boiling water 

____________________________________


* If you are unable to find Irel coffee essence simply use 1tsp of instant coffee dissolved in 1 tbsp of boiling water instead for the same results * 


Method 


FOR THE MOCHA SPONGE

1) Preheat your oven to 180C/ 350F / Gas Mark 4, grease an 8 inch round baking tin with melted butter and line with greaseproof paper. 
2) Cream the butter and sugar together using your electric mixer 
3) Once combined and white in colour add in the eggs, two at a time and beat. Allow one to two minutes of mixing between each. 
4) Once all the eggs have been added to the mixture, add the Irel coffee essence.
5) Once the essence is combined, add the flour, one spoon at a time until all is added.
6) Allow the mixer to beat for 3-4 minutes and add the cocoa powder followed by the grated chocolate and once again allow the mix to beat for a further 4 minutes. 
7) Fill your line cake tin with the mix and bake for approv 40 minutes until the sponge springs up once touched. 


* You may have a little extra mix leftover for some yummmmyy mocha cupcakes. Simply fill your muffin cases with 1-2 tsp of the mix and bake for 15- 20 mins *


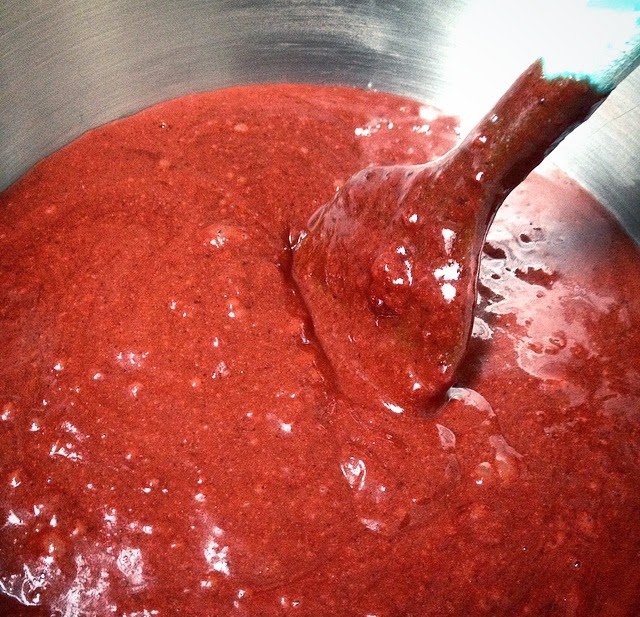
FOR THE CHOCOLATE COFFEE GANACHE

1) Melt the chocolate in a bowl over a pot of simmering water
2) Add the whipping cream followed by the instant coffee and sugar and combine 
3) Leave to sit until you are ready to spread 


FOR THE MOCHA BUTTERCREAM

1) Cream the butter and sugar together using the electric mixer until white in colour 
2) Add the Irel coffee essence and the cocoa powder and beat again
3) While beating on a high speed add the boiling water- this allows the buttercream to become lighter 
4) Add the melted chocolate, one tsp at a time while mixing on high speed 
5) Leave to one side until the cake is cool. 


THE TRADITIONAL COFFEE & WALNUT TOP TIER

Ingredients


FOR THE SPONGE

225g Butter (softened)
225g Soft light brown sugar 
225g Self Raising Flour (sieved) 
4 large eggs 
4 tbsp Irel Coffee Essence 
4 tbsp Crushed Walnuts 


FOR THE WALNUT CHOCOLATE GANACHE 

250ml Double Cream 
185g Dark Chocolate
4tbsp crushed walnuts 
2 tbsp Golden Caster Sugar


FOR THE COFFEE BUTTERCREAM

150g Butter (softened) 
300g Icing Sugar 
5-6 tbsp of Irel coffee 
1-2 tbsp boiling water 

____________________________________________________

Method 

FOR THE COFFEE SPONGE 

1) Preheat your oven to 180C/ 350F / Gas Mark 4, grease an 6 inch round baking tin with melted butter and line with greaseproof paper. 
2) Cream the butter and sugar together using your electric mixer 
3) Once combined and white in colour add in the eggs, two at a time and beat. Allow one to two minutes of mixing between each. 
4) Once all the eggs have been added to the mixture, add the Irel coffee essence.
5) Once the essence is combined, add the flour, one spoon at a time until all is added.
6) Add the chopped walnuts and allow the mixer to beat for a further 3-4 minutes. 
7) Filll your line cake tin with the mix and bake for approv 40 minutes until the sponge springs up once touched. 


FOR THE COFFEE & WALNUT GANACHE 

1) Melt the chocolate in a bowl over a pot of simmering water
2) Add the whipping cream followed by the chopped walnuts and combine 
3) Leave to sit until you are ready to spread 


FOR THE COFFEE BUTTERCREAM

1) Cream the butter and sugar together using the electric mixer until white in colour 
2) Add the Irel coffee essence and beat again
3) While beating on a high speed add the boiling water- this allows the buttercream to become lighter 
4) Leave to one side until the cake is cool. 

Saturday 9 August 2014

The Grand PP Arcade, Restaurant & Cafe, Koh Phi Phi.

We happened to stumble upon the spectacular Grand PP Arcade on the beautiful Thai island of Koh Phi Phi. We were instantly drawn into the cafe by the delicious smell of Thai cooking. We were seated in the dimly lit outside area below the fabulous lanterns and ceiling plants. The menu was quite concise, but still, with everything sounding so delicious, I found it extremely difficult to choose what to order. 


I decided to go for the vegetable spring rolls to start. They were, hands down, the nicest spring rolls I have ever eaten. The light pastry was stuffed with thin rice noodles and shredded veg and they weren't greasy in the slightest. I loved the rustic wooden boards the spring rolls were served on and the shot glass used for the sweet chilli dipping sauce. We each devoured all three in seconds!


For the main I went for the yellow Thai chicken curry which was also extremely delicious. The creamy coconut curry was served with basmati rice and a delicious side salad. Although we were advised not to eat salad while travelling, I couldn't resist!

  
          "The calm within the chaos."


The Grand PP Arcade is a must for anyone
 travelling to Koh Phi Phi !